Bike Gearing Part 2
Put theory into practice to get the most of your crankset and chainrings
Quick Navigation:
This article is the second in a series on bicycle gearing. If you missed out on the first article, it’s highly recommended the series be read in order since this article will pick up in the middle of the discussion from last time; part one may be found here.
I'm reposting the bike diagram found in Part 1. The terms can be confusing and I'm hoping this will help put the post in context.
Need a refresher on bike terms and anatomy? Below you will find a link to our illustrated guide and glossary:

Last time I promised we would discuss chain ring sizing and close the loop on connecting the physics of gears with the practical application of gearing to a bicycle.
Picking Up Where We Left Off
We learned last time how a gearing ratio is established through the radii of various gears, connected by the chain, and transmitted to the rear wheel. Last time we saw a somewhat complicated picture to describe this interaction. This time, we’ll look at an equation which relates cadence to speed. We find the following to be true—using nomenclature from last time:

If we allow:

We find the equation simplifies to the following, using familiar terms:

We can also change the diagram from the previous article, discarding angular and translational velocities, to include only commonly mentioned terms:
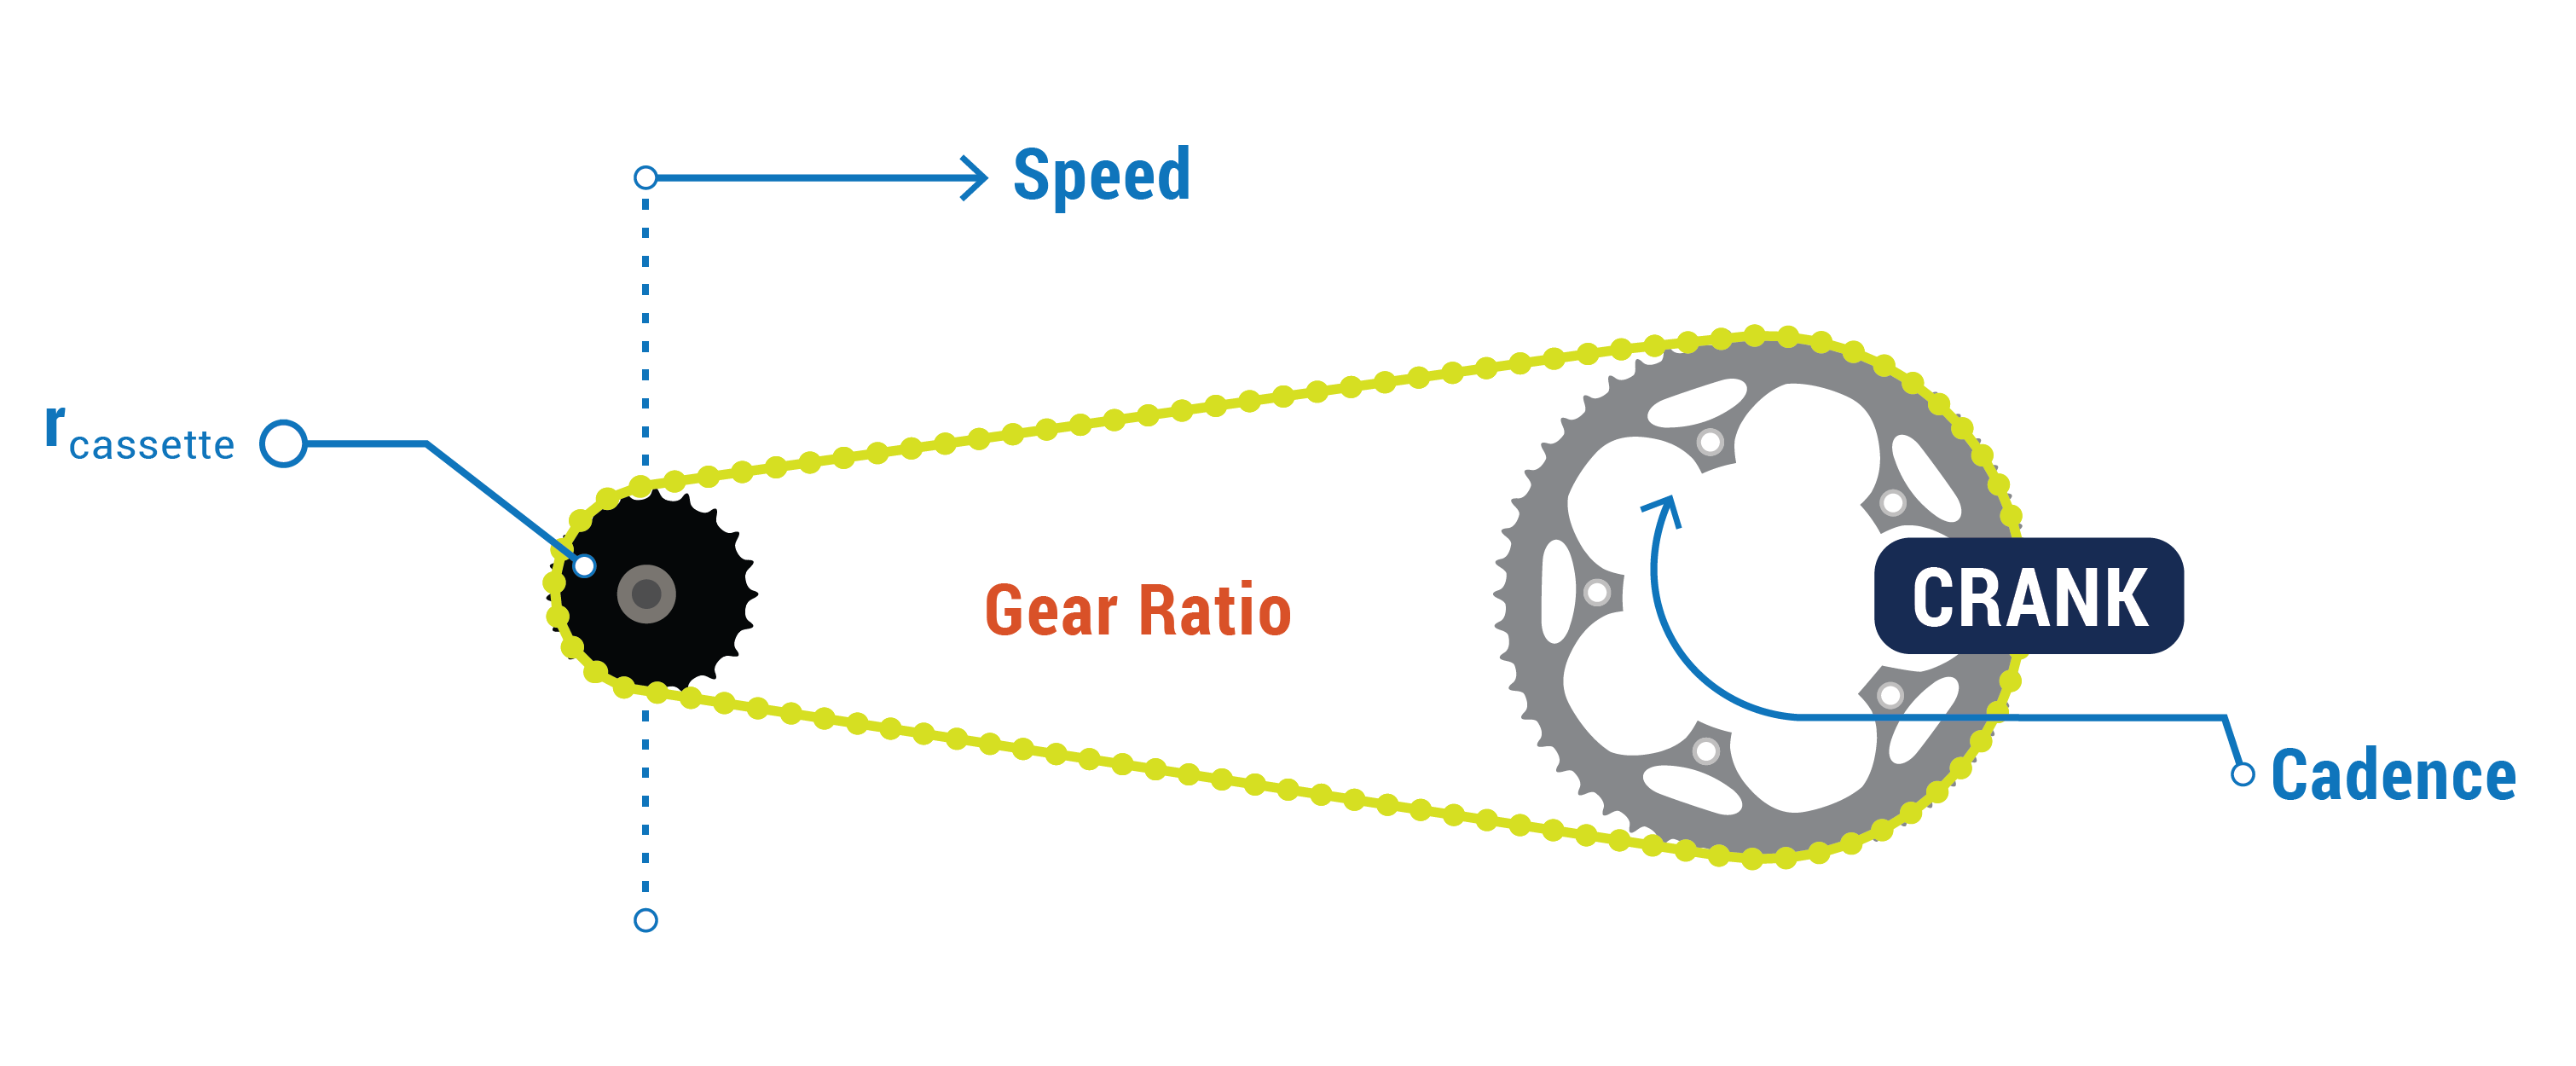
At this point, the image shown relating all the radii and rotational velocities may make more sense than after reading the first article when consulting the above equations. Also, the last equation should completely demystify how cadence and gearing plays a part in bicycle speed.
Last article we mentioned cadence, albeit casually. It was noted that different types of riders have different natural cadences, but how gearing could be adapted to a specific rider was maintained as a mystery. The chain ring selection allows for effective utilization of a rider’s natural cadence.
Crankset Fundamentals
Up to this point, the physics behind gearing and cassette selection have been discussed. Cranksets are the next topic for discussion. The crankset follows the same physical interactions we’ve discussed previously, relating rotational and translational velocity with the radius.
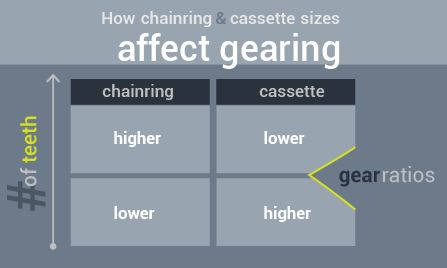
Chain ring selection is similar to cassette selection, in that more teeth translate into a larger radius. Where we differ this time is the ratio of radii which we presented last time, we’re concerned with the radius in the numerator rather than the denominator. Unlike the cassette, a larger radius—or more teeth—gives a higher gear ratio. We can see a higher gear ratio resulted in a higher speed for a given cadence. Things should make sense now how we can all ride at the same speed with different natural cadences.
Based on a rider’s natural cadence, the chainring size can be increased or decreased to affect the desired speed. There are limits, however. We know that any given rider has a speed they can ride for given conditions; since two chain rings and ten or more gears on the cassette pretty much ensure there will always be the right gear ratio for a desired cadence—the trick is making sure the majority of the gears are useful for those variables. The difference between common big chainrings, a cyclocross 46T to a time trial 55T, could end up being four of five gears different on the cassette, effectively eliminating half the cassette.

Typical chain rings—small and large—for different groups of bike: we see mountain bikes, with their lower average speed, have chain rings that are in the 20s and 30s; cyclocross racing—a seeming cross between a mountain bike and road bike—uses chain rings in the 30s and 40s; road bikes typically have their rings in the mid to high 30s and low 50s; time trial and triathlon bikes—built largely for straight and fast speed—find their chain rings in the high 30s/low 40s and low/mid 50s.
Ok, ok, I get it. Where can I buy a new crankset?
Let's put this knowledge into practice. Read on to see how used calculation and experimentation to find my ideal gear—and the steps you need to take to find yours.
This article was written by Matt Shinavar